Home Blog Page 7

Pan-fried chicken with mushroom sauce

The chicken with mushroom sauce recipe is one of those typical restaurant dishes that seem impossible to reach but actually is fairly easy if you follow a fairly easy approach.

The core components of this dish are adding starch to the sauce which will thicken it and using the same pan where we cooked the chicken in.

Video Recipe

Full detailed recipe

You will need:
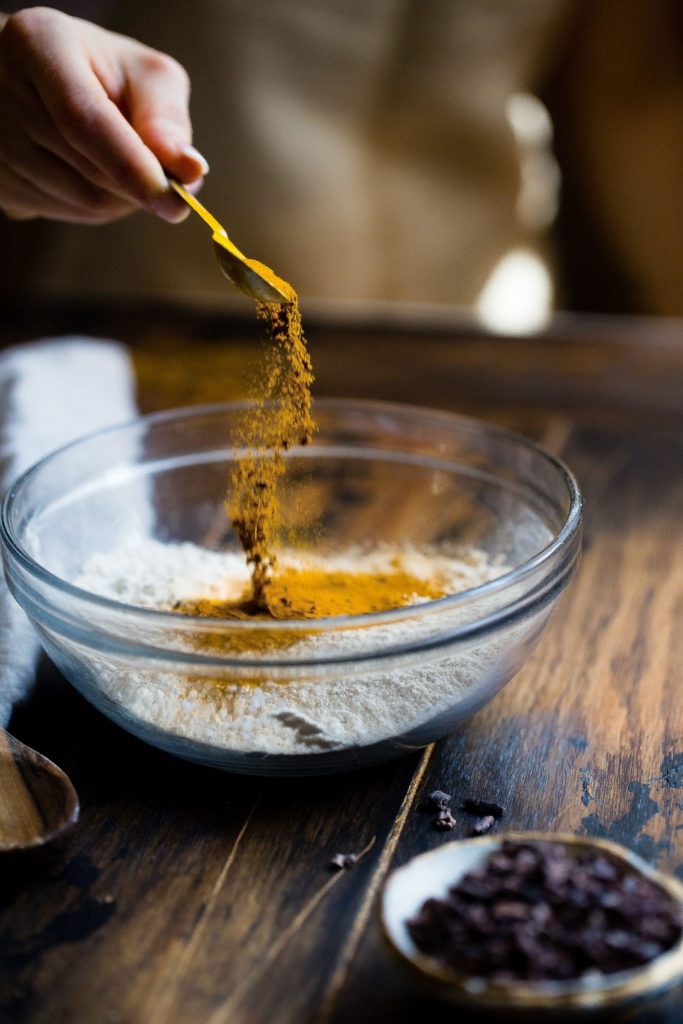
  1. 1 chicken or turkey breast cut in thin strips and marinated with salt, pepper, dried garlic, and paprika.
  2. half of an onion, sliced in small pieces
  3. 1-2 mushrooms
  4. 1 tablespoon of starch mixed in with 1 or 2 tablespoons of water
  5. a bit of milk
  6. a bit of butter
How to get it done:
  1. Let the chicken marinate for 10-20 minutes in a plastic bag with a bit of olive oil. the oil and the sitting will integrate the dried seasoning.
  2. In a hot pan with olive oil, add the chicken but do not overcrowd the pan . If you have more chicken, just do them step by step. No rush.
  3. After all the chicken is done, add the onion and lower the heat so you can cook it until it’s translucent.
  4. Obviously do not clean the pan – we want the leftovers there. They are all taste. That’s the fond.
  5. After the onions are translucent then add the mushrooms. They will release the water and then you should add a bit of marinating.
  6. Add the starch with water and you will see that the whole thing will thicken.
  7. Add a bit of milk and let it evaporate.
  8. At this point, you should check for seasoning, to make sure that it has everything it needs.
  9. Finalize with a bit of butter to add some shine to the sauce.

You can serve this chicken with mushroom sauce either all mixed up together or with the sauce on top. But they will need a side, and the best side that you will have is with home fries.

Smoky Chipotle Burger Patties

Lorem ipsum dolor sit amet, consectetur adipiscing elit, sed do eiusmod tempor incididunt ut labore et dolore magna aliqua. Nunc eget lorem dolor sed viverra ipsum nunc. Arcu bibendum at varius vel pharetra vel turpis nunc eget. Purus in mollis nunc sed id.

Feugiat nibh sed pulvinar proin gravida hendrerit lectus. Purus faucibus ornare suspendisse sed nisi. Ipsum dolor sit amet consectetur adipiscing elit ut. Rhoncus mattis rhoncus urna neque viverra justo nec. Risus sed vulputate odio ut enim blandit. In massa tempor nec feugiat nisl pretium. Aliquam id diam maecenas ultricies mi eget mauris pharetra et.

Malesuada pellentesque elit eget gravida cum sociis. Tellus elementum sagittis vitae et leo. Enim sed faucibus turpis in. Egestas integer eget aliquet nibh praesent tristique. Augue neque gravida in fermentum et sollicitudin ac. Semper auctor neque vitae tempus quam pellentesque. Adipiscing bibendum est ultricies integer quis. Elementum nibh tellus molestie nunc non blandit massa enim nec.

Sit amet nulla facilisi morbi tempus iaculis. Lobortis scelerisque fermentum dui faucibus in ornare quam viverra orci. Justo eget magna fermentum iaculis eu non. 

Feugiat nibh sed pulvinar proin gravida hendrerit lectus. Purus faucibus ornare suspendisse sed nisi. Ipsum dolor sit amet consectetur adipiscing elit ut. Rhoncus mattis rhoncus urna neque viverra justo nec. Risus sed vulputate odio ut enim blandit. In massa tempor nec feugiat nisl pretium. Aliquam id diam maecenas ultricies mi eget mauris pharetra et

Feugiat nibh sed pulvinar proin gravida hendrerit lectus. Purus faucibus ornare suspendisse sed nisi. Ipsum dolor sit amet consectetur adipiscing elit ut. Rhoncus mattis rhoncus urna neque viverra justo nec. Risus sed vulputate odio ut enim blandit. In massa tempor nec feugiat nisl pretium. Aliquam id diam maecenas ultricies mi eget mauris pharetra et.

Walnut ricotta pesto pasta with burrata

The walnut ricotta pesto pasta is a delicious Sicilian pesto alternative to the basil based Pesto ala Genovese. Now on account to keeping this simple and being truthful to my cooking skills, the best solution for this pesto is getting the Barilla alternative. It’s cheap, easy and has a pretty long shelf life.

What will you need is:

  1. your favorite short pasta
  2. About 2 tablespoons of the walnut ricotta pesto
  3. Olive oil
  4. 1 chopped garlic clove
  5. Salt and pepper
  6. a tiny burrata or some sort of soft cheese.

How to get it done:

  1. Cook the pasta in boiling salty water, 1 minute less than the defined time on the packaging. Reserve some of the pasta water
  2. In a pan, on a medium-low heat, add the olive oil and the garlic, and let is sear a bit
  3. Then add 2 tablespoons of the ricotta pesto and mix it up with the garlic. Add salt and pepper to your specific taste. Keep in mind that you should try it now to make sure that it has enough seasoning. It’s quite hard to adjust the seasoning after the pasta is added.
  4. Add half a cup of the pasta water and then add the pasta in
  5. Mix this walnut ricotta pesto pasta until the sauce is incorporated together
  6. Serve it with a small burrata on top for the additional taste.

As an alternative to the walnut ricotta pesto pasta, you can have the Pesto ala Genovese pasta. I did this recipe a while back – check it out on the link:

Note: I am not affiliated with Barilla. I just do this recipes because I like to – easy peasy.

Chocolate Spice Cake

Lorem ipsum dolor sit amet, consectetur adipiscing elit, sed do eiusmod tempor incididunt ut labore et dolore magna aliqua. Nunc eget lorem dolor sed viverra ipsum nunc. Arcu bibendum at varius vel pharetra vel turpis nunc eget. Purus in mollis nunc sed id. Malesuada pellentesque elit eget gravida cum sociis. Tellus elementum sagittis vitae et leo. Enim sed faucibus turpis in. Egestas integer eget aliquet nibh praesent tristique. Augue neque gravida in fermentum et sollicitudin ac. Semper auctor neque vitae tempus quam pellentesque. Adipiscing bibendum est ultricies integer quis. Elementum nibh tellus molestie nunc non blandit massa enim nec.

In massa tempor nec feugiat nisl pretium. Aliquam id diam maecenas ultricies mi eget mauris pharetra et. Tincidunt arcu non sodales neque sodales. In dictum non consectetur a erat. Viverra mauris in aliquam sem fringilla ut morbi tincidunt augue. Urna et pharetra pharetra massa. Metus vulputate eu scelerisque felis imperdiet. At in tellus integer feugiat scelerisque varius morbi enim. Sit amet est placerat in egestas erat.

“The best cake you’ll ever eat!”

-Anonymous

Sit amet nulla facilisi morbi tempus iaculis. Lobortis scelerisque fermentum dui faucibus in ornare quam viverra orci. Justo eget magna fermentum iaculis eu non. Tempus urna et pharetra pharetra massa massa ultricies mi. Feugiat scelerisque varius morbi enim nunc faucibus a pellentesque sit. Elit ullamcorper dignissim cras tincidunt lobortis feugiat vivamus at augue.

Sit amet nulla facilisi morbi tempus iaculis. Lobortis scelerisque fermentum dui faucibus in ornare quam viverra orci. Justo eget magna fermentum iaculis eu non. Tempus urna et pharetra pharetra massa massa ultricies mi. Feugiat scelerisque varius morbi enim nunc faucibus a pellentesque sit. Elit ullamcorper dignissim cras tincidunt lobortis feugiat vivamus at augue. Lectus arcu bibendum at varius vel pharetra vel. Purus semper eget duis at. Sapien faucibus et molestie ac. Nunc sed augue lacus viverra vitae congue eu consequat. Dolor sed viverra ipsum nunc.

Feugiat nibh sed pulvinar proin gravida hendrerit lectus. Purus faucibus ornare suspendisse sed nisi. Ipsum dolor sit amet consectetur adipiscing elit ut. Rhoncus mattis rhoncus urna neque viverra justo nec. Risus sed vulputate odio ut enim blandit. In massa tempor nec feugiat nisl pretium. Aliquam id diam maecenas ultricies mi eget mauris pharetra et. Tincidunt arcu non sodales neque sodales. In dictum non consectetur a erat. Viverra mauris in aliquam sem fringilla ut morbi tincidunt augue. Urna et pharetra pharetra massa. Metus vulputate eu scelerisque felis imperdiet. At in tellus integer feugiat scelerisque varius morbi enim. Sit amet est placerat in egestas erat.

Feugiat nibh sed pulvinar proin gravida hendrerit lectus. Purus faucibus ornare suspendisse sed nisi. Ipsum dolor sit amet consectetur adipiscing elit ut. Rhoncus mattis rhoncus urna neque viverra justo nec. Risus sed vulputate odio ut enim blandit. In massa tempor nec feugiat nisl pretium. Aliquam id diam maecenas ultricies mi eget mauris pharetra et. Tincidunt arcu non sodales neque sodales. In dictum non consectetur a erat. Viverra mauris in aliquam sem fringilla ut morbi tincidunt augue. Urna et pharetra pharetra massa. Metus vulputate eu scelerisque felis imperdiet. At in tellus integer feugiat scelerisque varius morbi enim. Sit amet est placerat in egestas erat.

Simple raw red cabbage salad

As you may be aware, I am currently living in Germany, and here they have this tendency to eat a lot of cabbage in the form of different types of krautsalat. Cooked, uncooked, pickled, yellow, green, raw red cabbage salad you name it. If you would visit a supermarket they have an isle with cabbage stuff. Weird but I am game.

A couple of notes on regards to it’s health benefits:

  1. It’s fairly antiinflammatory
  2. Packs a huge amount of vitamin C, vitamin K, and vitamin A.
  3. It’s very easy to add to your diet as you can make it a side for almost anything
  4. it is one of those low-calorie foods that are awesome for you

Red cabbage where I am from is eaten as a salad and mainly raw or pickled. Pickling is another thing, but today we will focus on making a simple raw red cabbage salad.

First things first we need to prepare the salad. Slice into very thin strips and place it in a big bowl. Now, this is counterintuitive but you have to salt it now. At this point, with your hands, you need to mash it. The nature of the red cabbage is that is very tough and needs to be softened up.

Then we need to add some dressing. Again, due to the somewhat bitter notes of this cabbage so the dressing needs to be fairly acidic. So I would recommend either olive oil and lemon or if you want it to be a bit fuller, add some yoghurt to the loop.

You know what goes great with this type of salad? This delicious soup.

Oven-roasted baby potatoes

Today’s recipe is one of those no brainers that you keep on wondering, how on earth you did not get it done sooner. These oven-roasted baby potatoes are the simplest and act as a delicious side dish to every main dish that you can think of.

To get them done all you have to do is boil the potatoes and finish them in the oven. Just make sure to pick the baby potatoes as they have that silky delicious texture to die for and they do not need too much cooking time

They work perfectly if you have a steak that you need a side or even if you just want to have something with your chicken breast or a pan-seared salmon.

We usually cook this dish with the roasted beans in tomato sauce or a spinach souffle. All of them together are awesomely and beautifully paired with a steak or a simple chicken breast. Some night, I even grab a cooked chicken from the market, and cook just the sides – it makes everyone happy.

The approach is simple and these are the core components:

  1. Baby potatoes are delicious with their skin on. I would recommend giving them a wash first though.
  2. Boil the potatoes for 20 minutes in salty water. You will know when they are ready when you can poke them easily with a fork.
  3. Warm up the oven at 220 deg
  4. Slice the baby potatoes in half
  5. In a casserole, throw the baby potatoes and marinate them with salt, pepper, rosmary and olive oil.
  6. What we are looking for here is a good char on the potatoes, so let them bake for 10-15 minutes

That’s it. The oven-roasted baby potatoes are ready to eat. They will be soft and delicious inside and with some edgy and tastefully settled char on the inside.

Some even say they are the perfect dinner dish addition, because of their subtleness (of being just potatoes) and their awesome surprising taste.

Roasted beans in tomato sauce

The epitome of the best vegetarian dish in the Mediterranean, these roasted beans in tomato sauce are packed in so much protein, antioxidants, and fiber that can make anyone happy while being such an inexpensive dish.

Traditionally, at least in my family, this recipe has always been as a side dish in our Sunday get together.

As the beans here are the key component, getting those big kidney beans would be the best, but any other type of beans work, to be honest. In the post you will find two recipes:

  1. The first one with fresh beans
  2. The second one with already canned beans

You will need for the fresh beans:

  1. Fresh beans soaked overnight
  2. one chopped garlic
  3. half a chopped onion and peppers
  4. some sort of tomato sauce
  5. Optional:
    1. Bay leaf
    2. Hot peppers
    3. Fresh parsley

How to get it done:

  1. In a deep pot, add some olive oil and saute the onion and the peppers
  2. After the onions are translucent throw in the chopped garlic
  3. Give it a quick stir and then throw in the beans and then add the tomato sauce. The tomato sauce can be chopped tomatoes, tomato pure or anything that you have.
  4. At this point, I would put the heat to medium and add about a glass of water. What we are aiming for is about 30-40 minutes of boiling. After which we expect most of the liquid to have evaporated.
  5. If you have a bay leaf laying around, add it
  6. These roasted beans in tomato sauce now should be somewhat soft. Keep in mind that they will spend around 30-40 minutes in the oven
  7. Turn on the oven at 180 degrees
  8. If you have small casseroles, throw in the mixture, add some olive oil, top it with some salt and pepper.
  9. Usually, when we cook this, we make a couple of casseroles as it dries faster and you get crunchy beans on top.
  10. Bake them for 30-40 minutes. Give the beans a try before you take them out as they are supposed to be cooked.

For the canned beans:

  1. Depending on the type of beans that you have, some are sweeter than usual. Keep that in mind and adjust as necessary when it comes to marinating.
  2. Disregard the water and the 30 minutes of boiling.
  3. Put less sauce as the extra water will not evaporate.
  4. Adjust the baking as necessary. I would recommend around 15-20 min in high heat.

On another side note, check out this recipe about making or buying products or sauces. Similar cheaping out logic.

Anchovies and mozzarella bruschetta

This is one of those quick recipes that will do wonders for a quick snack or even as an appetizer. These anchovies and mozzarella bruschetta are done with some delicious toasted bread, olive oil, awesome moist cheese which is coupled awesomely with salty cured fishies.

You can make this recipe in any way that you want as I will explain to you the concept:

  1. Toast some bread.
  2. Once it is toasted, throw in a bit of olive oil
  3. Add a slice of fresh mozzarella
  4. Freshly ground pepper on top
  5. A slice of anchovy.

It is that easy!

Now hold it there – I know this recipe is easy, but hand out for a second so I can explain to you the logic of how to make the tastiest bruschetta in the world.

Bruschettas are bite-sized treats that are supposed to make your life better that are packed with flavor, filled with special ingredients that you can not eat a lot of. Think of truffles if you are a chocolate fan.

Now here are the components that you will need:

  1. You will need a base. That base is usually bread. Now as always, the base should be freaking outstanding. Either your brand should be fresh from the oven or you need to toast it.
  2. You will need a buffer. The buffer in this recipe is mozzarella. It provides a body to the bruschetta and has a very delicate taste.
  3. You will need something with a very strong flavor. Something that you can not serve on its own because the taste is too much. You can use here aged cheeses, dries fish, smoked or aged meats. I have used anchovies.
  4. You will need something to bind it together and that is more often than not, some top-notch olive oil to die for.

So here it is how we made these anchovies and mozzarella bruschetta and the logic behind it so that you can replicate with whatever you got in the fridge.

Now as this is a starter, check this awesome pasta recipe to pair it with.

Easy spinach soufflé that anyone can do

When you read the word souffle, you think of fancy french dishes. The difference between what you are thinking and this easy spinach soufflé is that there is nothing fancy going on here. You just saute the stuff in a pan and finish in the oven in a small ovenproof container.

Now there are plenty of ways to do this and done of them are done with a bechamel sauce. I am generally not a fan, so we are switching for heavy cream, but in the end, it’s up to you. You can switch for anything, that’s the beauty of the recipes that we are doing here for this easy spinach soufflé.

The last comment is that you will not see measurements. That’s because this dish can be very versatile. You can make it very spinach or very creamy. I will not tell you what to do. Another dish that I will not tell you what to do is this Chili con Carne that forgives everyone.

You will need:

  1. Spinach, either frozen or fresh
  2. Heavy cream
  3. A bit of milk
  4. 1 clove of garlic
  5. Half of a chopped onion
  6. Shredded parmesan for a cool finish.

How to get it done:

  1. Turn on the oven to 200. If you do not have the oven, then you must have a toaster oven. At this point, just cook the whole thing a bit longer and you just let it get a cool finish. If you do not have that as well, then disregard the whole finishing. See you don’t even need an oven.
  2. In a hot pan, throw in the chopped onion with olive oil. Saute them a bit till they become translucent. Then add the garlic. We always add the garlic later as it has the tendency to get burned and we don’t want that because burned garlic gets bitter.
  3. Add the spinach and saute everything together. Marinate them with salt, pepper, and paprika. Depending on the type of spinach, it will release a bit of water, so just stir everything up and cook it for a bit.
  4. Once the spinach has released all the water, add the heavy cream. If it gets too thick and you need to add a bit of milk.
  5. The best way to finalize it is to make sure that everything is cooked by tasting it. Generally speaking, if you followed the flow everything should be cooked.
  6. Now throw everything in an oven-proof container, put the shredded parmesan on top and bake it for 5-10 minutes.

Serve it as a side dish or for dipping. This easy spinach soufflé does it all.

Mediterranean sauteed tomatoes, peppers, and feta

As you may have noted from the title, this Mediterranean sauteed tomatoes, peppers, and feta is a fairly Mediterranean dish. We mainly use it as an appetizer with toasted bread. Whilst there may be a lot of ways to get this done, where a lot includes stuffing the papers and whatnot, this is not one of them.

You will need three main ingredients with the fourth point for oil and salt

  1. 3-4 medium Peppers
  2. 3-4 medium Tomatoes
  3. 250gr of Feta
  4. Olive oil for cooking and salt to taste

How to get it done

  1. In a hot deep-pan, throw in some olive oil and let it warm up.
  2. Throw in the chopped peppers and let them soften a bit.
  3. After the peppers are soft, add in the chopped fresh tomatoes. Note that it’s fairly important to use fresh tomatoes.
  4. Let everything cook together and for like 10-15 minutes and after you have archived the done-ness that you prefer (for example you like the tomatoes with a bit a structure and bite, then cook it a bit less)
  5. Remove from the heat and add the chopped feta cheese and the heat of the mixture will melt the cheese.
  6. At this point give it a taste. Depending on the cheese that you are using, you will need to adjust the saltiness.
  7. That’s it. Now keep in mind this is great with some very nice toasted bread.

Dip it, share it, eat it with a spoon – this dish does it all.